Quick Reference Guide
Maps: Pin Styling
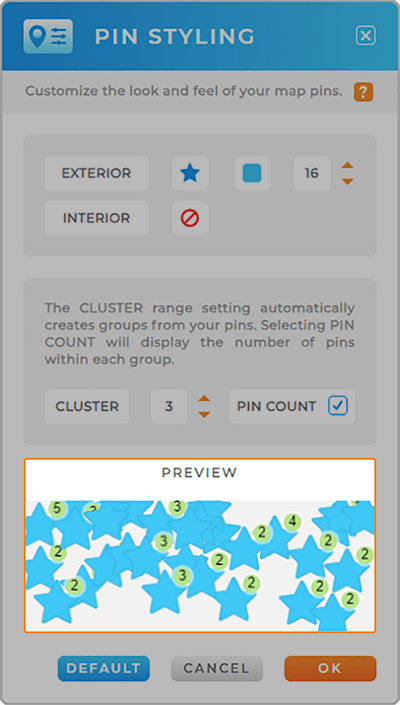
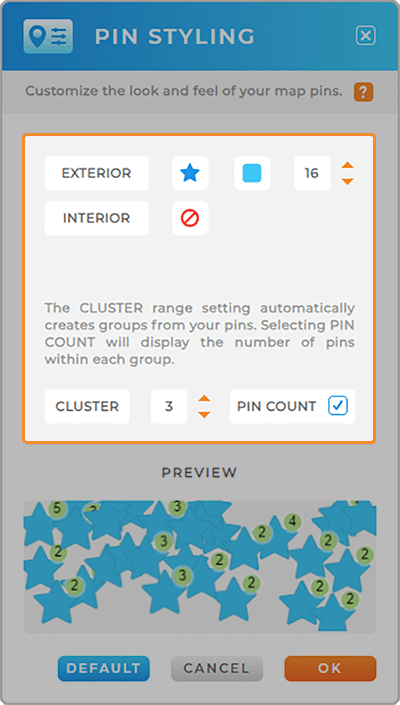
PIN APPEARANCE
Use distinctive pin shapes and colors distinguish high-performing regions, distribution centers, customer locations on your map, and more!
First, select your desired pin shape, color, and size. Then, decide if you want a white interior shape within each pin. If you change your mind, you can easily remove styles by clicking the red NO sign.
And have fun! Play around with different shapes to make your maps even more useful.
PIN CLUSTERS
If you have a high volume of pins, turning on pin clusers cleans up your map appearance. This is a great way to customize your map appearance, limit visual overwhelm, and maximize usefulness and ease of navigation.
Choose from the following cluster options:
- CLUSTER: Create groups of pins that cluster together in high-volume areas. The number you select indicates how many pins can cluster together at a time. When you zoom in, the pins will ‘separate,’ giving you full control over your map.
- PIN COUNT: When enabled, a number appears next to your pin groups, indicating how many pins are in each cluster.
Pro Tip: Want to make your map stand out? You can easily upload your own custom images to use as pin icons! Just click on EXTERIOR SHAPE, then navigate to the CUSTOM tab to upload your file. For best results, be sure your image has a transparent background—that way, it blends seamlessly with your map.
DYNAMIC PIN COLORS
Maybe you need your pin colors to change whenever your data changes? Let’s check out how to configure dynamic pin colors to ensure your maps are always up to date!
First, open the color picker and click the AUTOMATED tab. Here, you’ll see two different types of dynamic pin styling:
Pin Numeric Data
Use numeric data from your dataset to determine pin colors dynamically. This is a fantastic way to ensure that your pin colors stay up to date, even if your data changes!
This type of dynamic styling is perfect for tracking sales, delivery status, appointments, and other relevant KPIs in real-time. Just select the column from your dataset that contains the numeric data you need, then customize the output:
- EXCLUDE ROWS WITH ZERO VALUES: Remove rows from the visualization where numeric data equals zero.
- TREAT BLANK VALUES AS ZERO: Consider blank cells in the dataset as zero when calculating pin colors or other visualizations.
- COLOR SPECTRUM: Customize the gradient you’d like to use for your color-coded pins. Use our presets or create your own.
- COLOR GROUPS: Limits the number of distinct colors used in the heat map color gradient based on the number of numeric categories in the dataset.
- LEGEND: Choose where your map legend appears: top right, top left, bottom right, or bottom left.

Specified Pin Colors
Use existing dataset column that lists custom hex codes or HTML color names. This is ideal for locations that already have their own custom assignments based on your specific business needs.
First, select the column from your dataset that contains the colors you’d like to use, then click the blue checkmark to apply your changes.
This gives you the versatility to set your own custom pin colors. It’s a great option if you already have custom colors listed in your data.
For example, maybe your pins are already color-coded by sales or product type. Just select the column that lists this information and BOOM! Your custom pin colors appear on the map.
It couldn’t be any easier than that!

PREVIEW WINDOW
Here is a quick snapshot of how your pins will appear on the map with your current settings. Reference this preview as you apply your customizations so you don’t have to go back and forth between the map and the Pin Styling window.
PUT YOUR PINS TO WORK
Here are some common ways businesses leverage pin styling to streamline efficiency and maximize ROI:
- Visualize Sales territories: Use distinct pin styles to represent different sales territories, providing a clear visual representation for sales teams to easily understand their assigned areas.
- Customer Segmentation: Style pins based on customer segments or categories, aiding in the identification of high-value customers, target demographics, or areas for potential growth.
- Competitor Analysis: Highlight competitor locations with unique pin styles, enabling businesses to analyze market saturation, identify strategic opportunities, and make informed decisions in competitive landscapes.
- Risk Assessment and Mitigation: Implement distinct pin styles to mark areas of potential risk or concern, aiding businesses in risk assessment and proactive mitigation strategies.
- Supply Chain Visibility: Differentiate pins to represent different stages in the supply chain, offering businesses a visual representation of the flow of goods, transportation routes, and potential bottlenecks.