Quick Reference Guide
CONNECTORS: BING ADS
- Quick Reference Guide
- CONNECTORS
- BING ADS
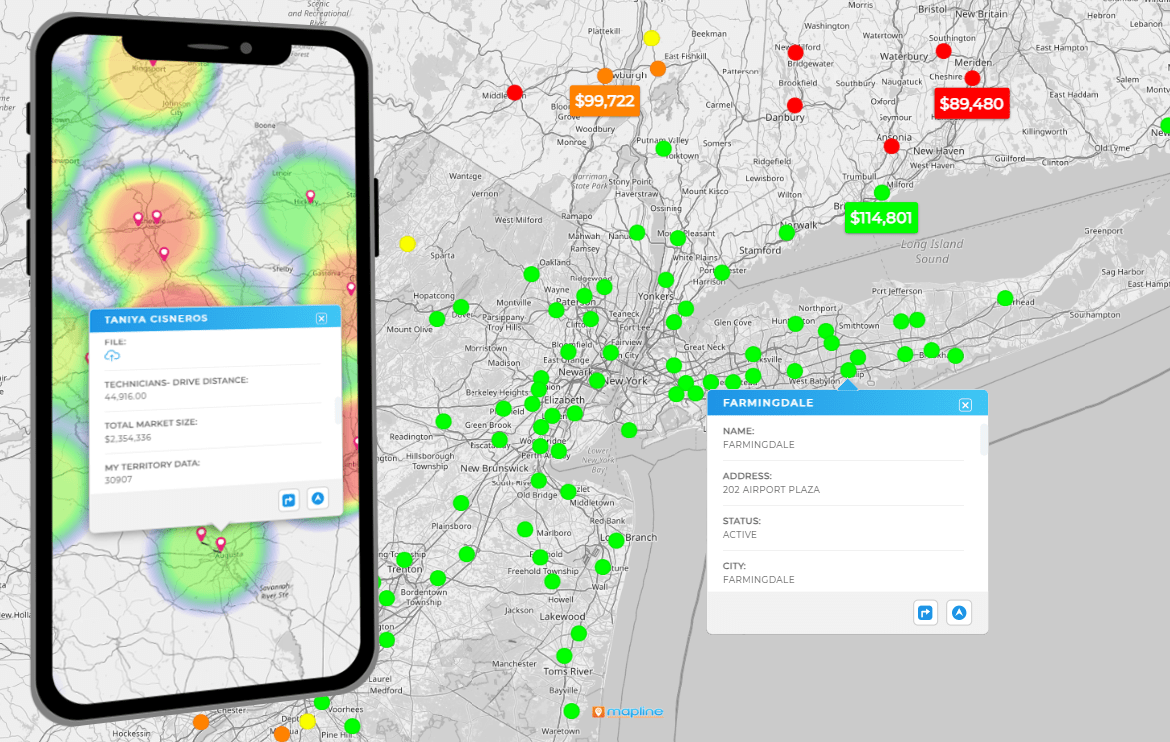
Seamlessly link your Bing Ads account (also known as Microsoft Ads) with Mapline. That way, you can instantly visualize and track all of your campaign data, unveiling new location insights that are far more powerful than Bing Ads by itself!
Visualize location-based data, track performance across different regions, and make data-driven decisions faster than ever. Essentially, you get a whole new way to leverage your marketing efforts and supercharge your business growth. How cool is that?
LOCATE BING ADS ACCOUNT ID
Now, before we get to the fun part, you’re going to need your Bing Ads (Microsoft Ads) Account ID. Don’t worry—it’s simple to find. Follow these quick steps to grab the exact IDs Microsoft uses in the API:
- Sign in to your Microsoft Advertising (Bing Ads) account.
- Go to Campaigns and switch to the account you want to connect (if you have more than one).
- Look at your browser’s address bar. You’ll see two parameters in the URL:
aid=→ Account ID
- Copy your Account ID; you’ll paste it into Mapline when creating your connection.
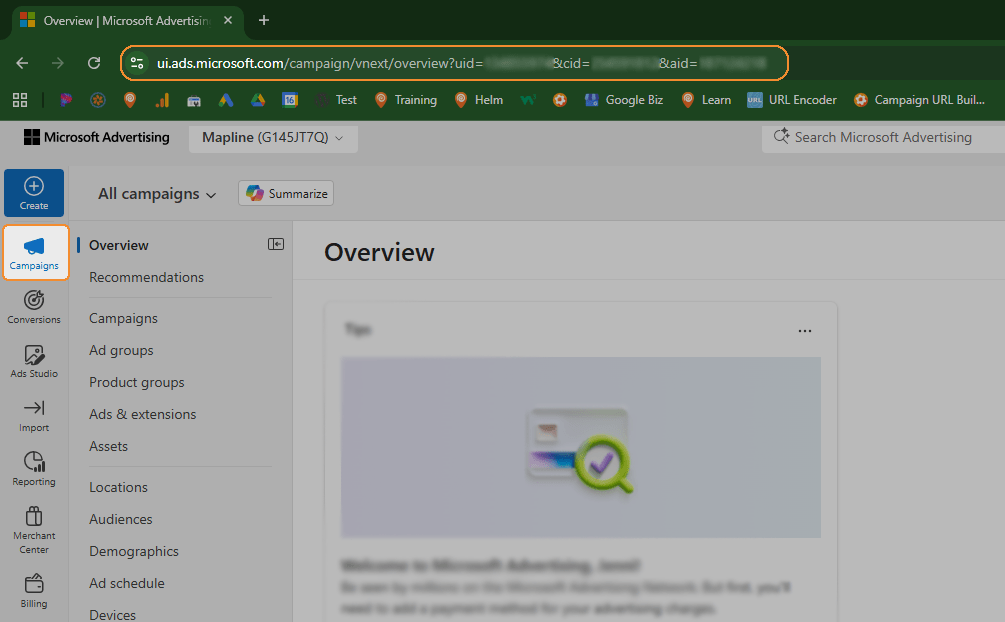
In this example, cid=234567891 is your Customer ID and aid=345678912 is your Account ID.

Pro Tip: Microsoft sometimes shows a friendly “account number” in the UI; for API access, use the IDs from the URL above (the cid and aid values).
If you manage multiple accounts, repeat the steps for each account you plan to connect.
ADD NEW CONNECTOR
Alright, next, open up Mapline, and in the top-right corner, click your name and select CONNECTORS from the drop-down menu.
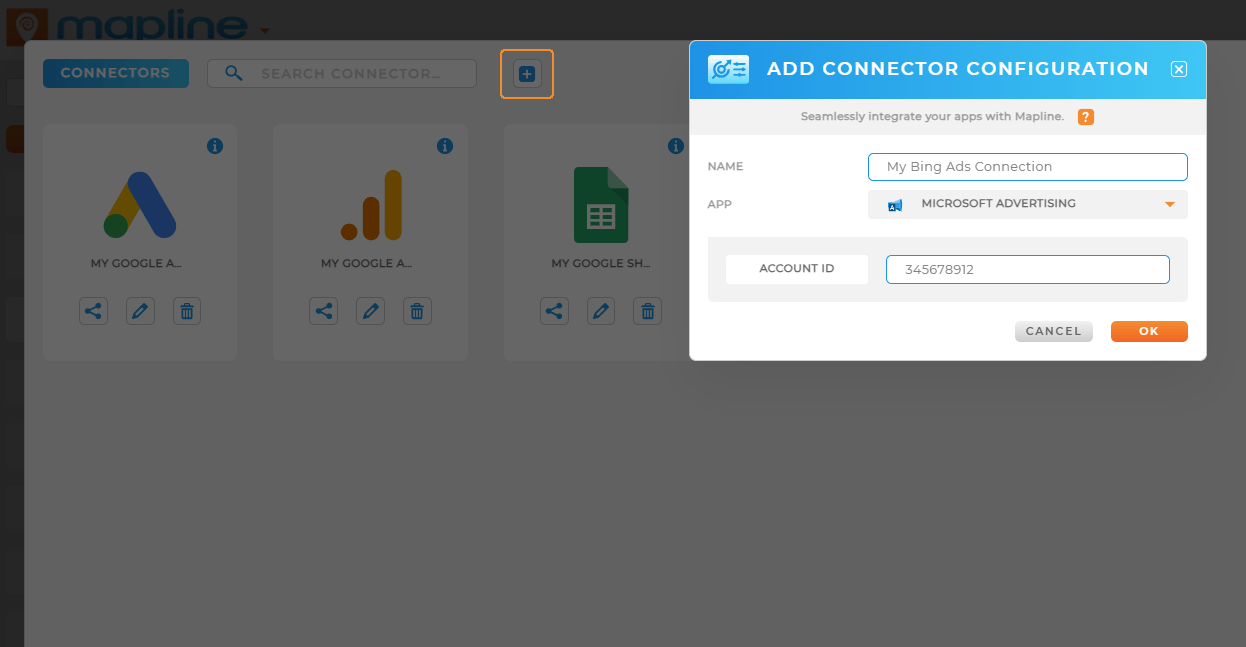
Once you’re in the connectors menu, click the blue plus (+) sign to add a new connector. From here, name your connector and select BING ADS from the app dropdown menu.
Finally, paste in that Customer ID you copied earlier, and click OK.
AUTHORIZE BING CONNECTION
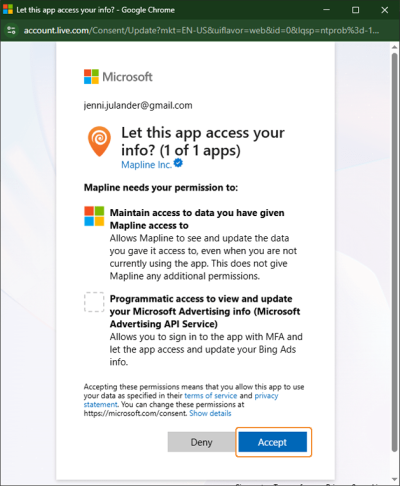
Now comes the final step to complete the integration. When you’re ready to connect your Bing Ads account to Mapline, you’ll be prompted with a screen like the one pictured.
This will ask you to grant Mapline permission to access your Bing Ads account.
Don’t worry—this is necessary for the data sync to happen. All you need to do is click ACCEPT.
Once that’s done, you’re all set! You’ve officially connected your Bing Ads account to Mapline and can now access and analyze your data with ease. Simple as that!
DO MORE WITH YOUR DATA
Now that everything’s set up, it’s time to put your data to work. The Bing Ads Connector lets you do a lot more than just view your campaigns. Once your data’s in Mapline, here’s a taste of what you can do with it:
- Visualize performance data by region, and see where your campaigns are really hitting it.
- Analyze customer location data, and figure out the most profitable areas to target.
- Track ad performance over time to identify trends and make smarter decisions.
- Create heat maps of your campaigns, making it easier to pinpoint areas that need improvement.
