Quick Reference Guide
Embedding
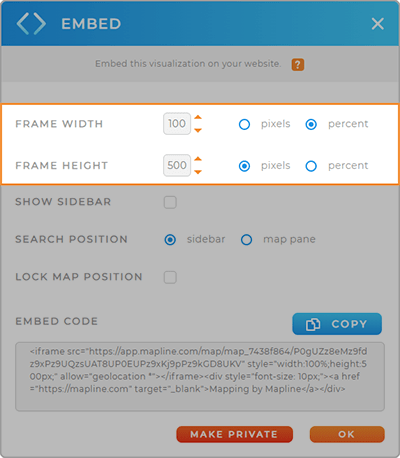
FRAME SPECIFICATIONS
Choose the width and height of your map frame. Frame size can be set to Pixels or Percent.
Pixels are a great way to set the map frame size if you need your map to always appear the same size, no matter which screen it’s displayed on.
Percent is a better choice if you want a scalable image for a responsive website; in other words, the map will always scale up or down based on the screen size.
DISPLAY OPTIONS
Click the Show Sidebar checkbox if you want to enable website visitors to see the map sidebar and all of your Layer Folders. They will not be able to change these folders or interact with them.
Search Position gives you control over where the search bar appears on your map.
Lock your map position if you don’t want viewers to zoom in and out on your embedded map.
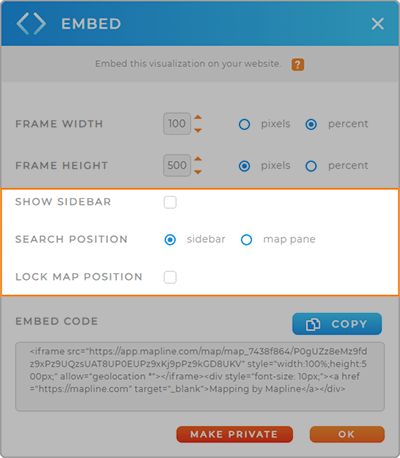
Pro Tip: If your sidebar is hidden, the search will also be hidden from your map.
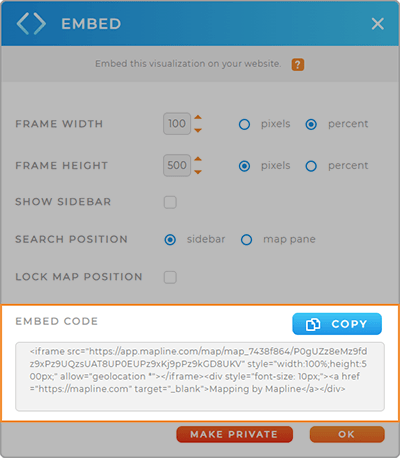
EMBED CODE
Click the blue Copy button in the Embed Code section to copy the embed code for your map.
Paste this code into your webpage HTML. Or, if you’re using a website builder, look for a custom HTML section or an embed code section.
Pro Tip: Hoping to create a store locator or a searchable map for your website? Check out the URL variables that are available in Mapline so you can empower users to search your maps.
If you have hundreds or thousands of stores and need to generate unique links with URL variables for each store, it doesn’t need to take hours. Just provide a list of all of your stores to Chat GPT, specify which URL variables you need to use, and let AI do the rest!
MAP PRIVACY
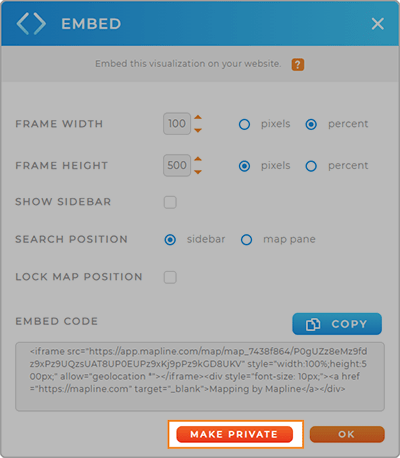
Embedded maps are public on your website. This means that anything you’ve included on the map will be visible to anyone who visits your website.
If, at any point, you would like to make your map private again, return to this lightbox and click the red Make Private button at the bottom of the screen. This prevents the map from displaying on your web page(s).
Pro Tip: You cannot make an embedded map private through your Mapline settings. If you want to embed a map but only share it with a private audience, you’ll need to create a password protected webpage. But even this will not stop people from taking screenshots of your map or sharing their password with others.
DO MORE WITH YOUR DATA
Embedding maps makes it easy to share your data in the places where decisions actually happen. Instead of static screenshots, you can provide live, interactive views that stay up to date and give users the ability to explore data on their own. This turns your maps into a powerful communication and decision-making tool.
- Embed live maps in websites or dashboards: Give stakeholders instant access to real-time data.
- Enable self-serve insights: Let users filter, click, and explore data without needing reports.
- Keep everyone aligned: Ensure teams are working from the same up-to-date information.
- Highlight key insights visually: Use maps to clearly communicate trends, coverage, and opportunities.
