Quick Reference Guide
Maps: Labels
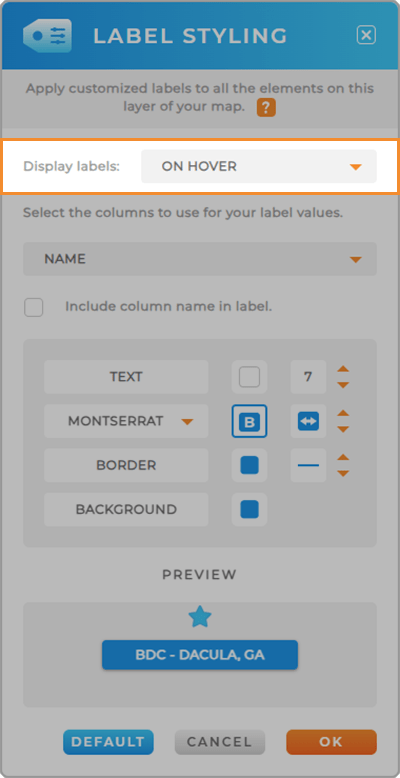
DISPLAY BEHAVIOR
Here’s the scoop on labels: they’re not just static; you have complete control over when and how labels appear on your map.
For example, you may decide to keep your labels visible at all times, which allows you to see essential information at a glance.
Or, if you’re concerned about cluttering up your maps, don’t worry – just configure your labels to appear only when you hover over or click on map elements. Just click the drop-down menu to set your preference.
Here’s a quick run-down of all the different types of display behavior:
ALWAYS: Labels are visible on your map at all times, keeping key information readily-accessible.
ON HOVER: Labels only appear when you hover your mouse pointer over the map element. This keeps the map clean and only displays information when needed.
ON CLICK: Labels only appear when you click on a map element. This is a manual way to access label information.
ON HOVER AND CLICK: Labels will appear both when you hover or click on a map element, allowing you to access information both ways.
NONE: Lables will not appear on your map at all.
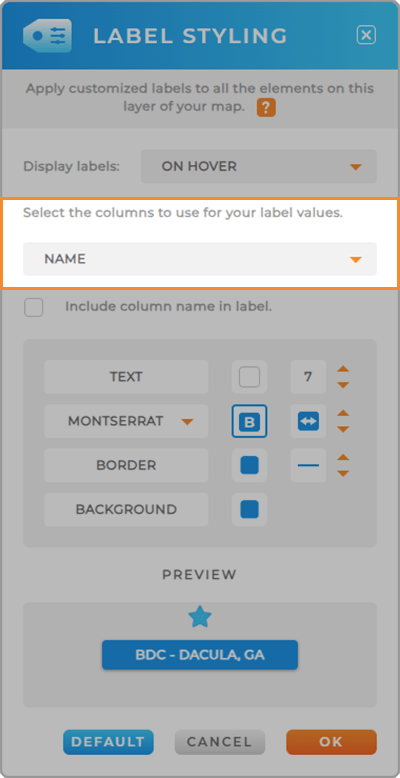
LABEL VALUES
Did you know you can pull labels directly from your dataset columns?
And the great news is that you can utilize multiple columns simultaneously.
For example, imagine you want to display the name of a territory, the assigned sales representative, and the month-to-date sales, all clearly marked on your map. All you have to do is select these relevant columns from your dataset, and BOOM! You’ve transformed your map into an informative, comprehensive visual aid.
Lables may seem simple, but they’re a real game-changer when it comes to making your data shine and informing data-driven decisions.
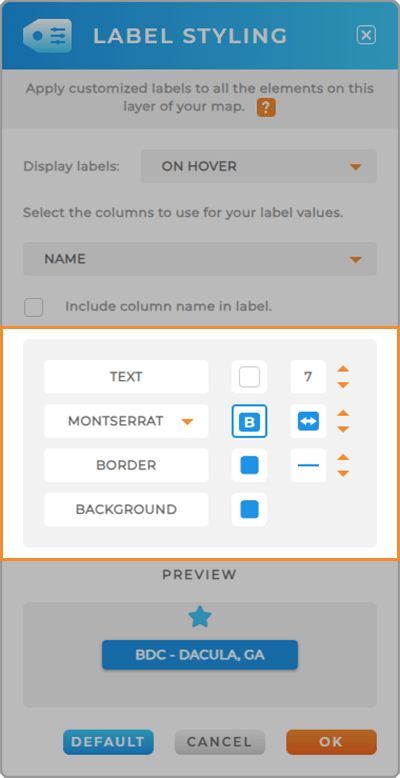
LABEL APPEARANCE
Adjust the appearance of your labels! This is a crucial step, as it allows you to harmonize your map with your brand identity or create a polished, uniform look that enhances the overall visual appeal of your map.
Select from the following customizations:
Text Color & Size: Select your font color and size. The larger the font, the larger the label.
Font Options: Choose your font, font styling, and padding (how much space is between your text and the edge of the label). Serif fonts are typically the best fonts for digital displays
Border: Adjust your border color and thickness. Borders help your labels stand out against the background of your map, especially if the label is a similar color to the territory color.
Background: Adjust your background color. This is the color of the label itself, or the box that goes around your text. If you don’t want a box around your text, just select the NO symbol in the color picker.
Use the PREVIEW window to confirm the appearance of your labels before you click OK.