Quick Reference Guide
Sharing
- Quick Reference Guide
- Sharing
Share information in seconds with Mapline’s share function!
For example, share maps with colleagues to keep everyone in the loop about territory assignments.
Or, save a report with your sales team showing who’s in the lead! Sharing visualizations not only empowers your team with more information, but it can be motivational and promotes collaboration too.
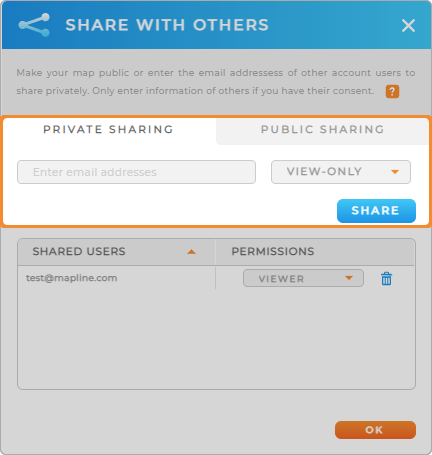
PRIVATE SHARING
Protect your data with private sharing. Ensure that need-to-know information is only seen by the right people, and limit their ability to share information when necessary.
Only users with a Mapline login can access visualizations that are shared privately.
VIEW ONLY
This setting is ideal for any data you need to share, which should not be changed or altered by the person with whom you’re sharing.
While users will not be able to download or change anything, they can still take screenshots if they so choose.

EDIT
This setting enables users to view, edit, and download the dataset or visualization you’re sharing.
There are multiple layers to sharing permissions in Mapline. For example, if you give a user Edit access to a map, they can change, view, or download the map. However, they may not be able to do the same thing with the datasets tied to that map, depending on permission settings.
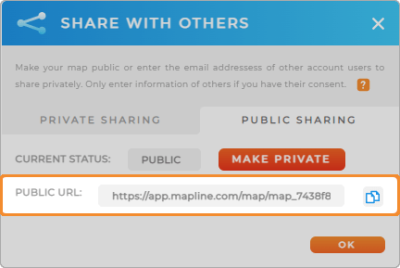
PUBLIC SHARING
Generate a public URL and share your visualizations with anyone. Just copy the URL and share it wherever it’s needed!
A public URL is accessible to anyone on the internet, so use discretion and follow your company’s policies when sharing publicly.


Pro Tip: To control the visibility of a map sidebar, adjust the map’s settings in the Embed menu. These settings determine whether the sidebar is included when sharing your map.
REVOKE ACCESS
Users with a Mapline login who have access to your visualizations through private sharing are listed under the Shared Users section.
Here, you can update permissions or delete users.
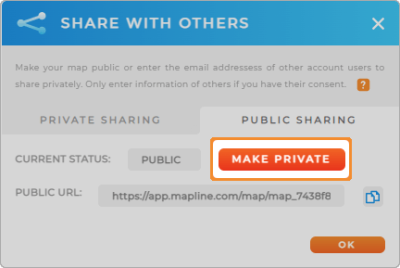
If you want to revoke access to a publicly shared visualization, just click the red Make Private button under the Public Sharing tab.
This breaks the public URL, and anyone with this URL will no longer be able to see your data or visualization.


Pro Tip: Users receive an automatic email notification when you share something with them privately. What a time-saver!


