Quick Reference Guide
Workflow Actions: Alert Message
- Quick Reference Guide
- WORKFLOWS
- Alert Message
Need to stop users in their tracks with key info before your workflow continues? An Alert Message is the perfect way to display quick, non-blocking popups during automation. Whether you’re warning, informing, or instructing, this step ensures your message gets seen—exactly when it matters.
No more missed details or guesswork. Add clarity and confidence to every interaction—then keep your workflow moving. Here’s how to set it up:
ADD AN ALERT MESSAGE
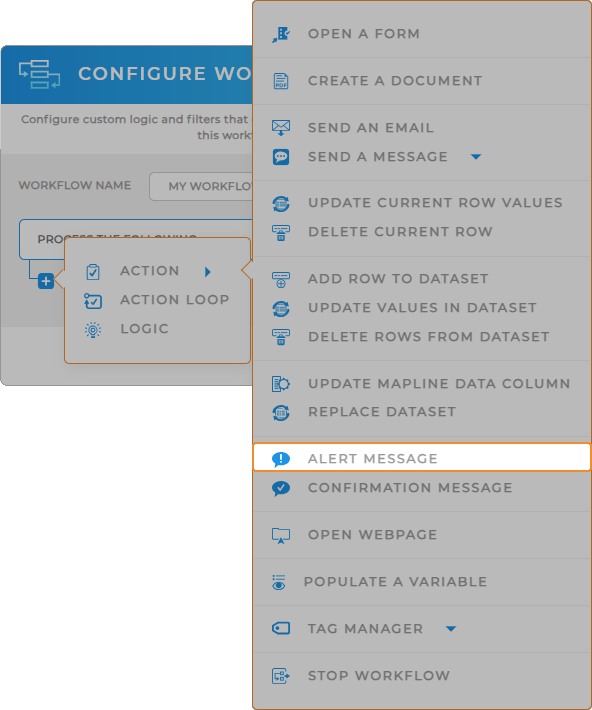
Start by adding the Alert Message action to your workflow. This tells Mapline to display a message to the user at a specific moment in the automation.
- Click the + icon inside your workflow builder
- Select Action > Alert Message
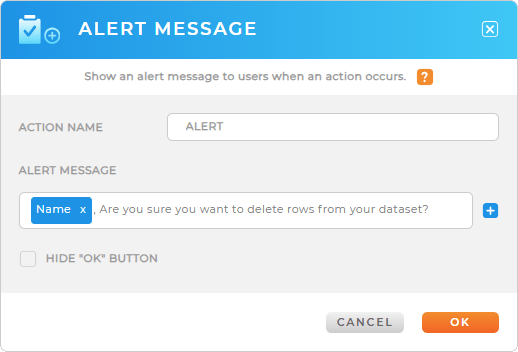
- Give your alert a name like “Missing Info Warning” or “Next Steps”


Pro Tip: Use Alert Message at the start of your workflow to reduce errors, reinforce expectations, or guide new users through next steps. And if you want them to confirm they’ve read it, follow it up with a Confirmation Message action.
CONFIGURE THE MESSAGE
This is where you type the message that will appear. Keep it brief and clear—most users will read it at a glance.
- Type your custom message (up to 500 characters)
- Use line breaks or formatting for better readability
- This message will display automatically before the workflow continues

MAKE IT CONDITIONAL (OPTIONAL)
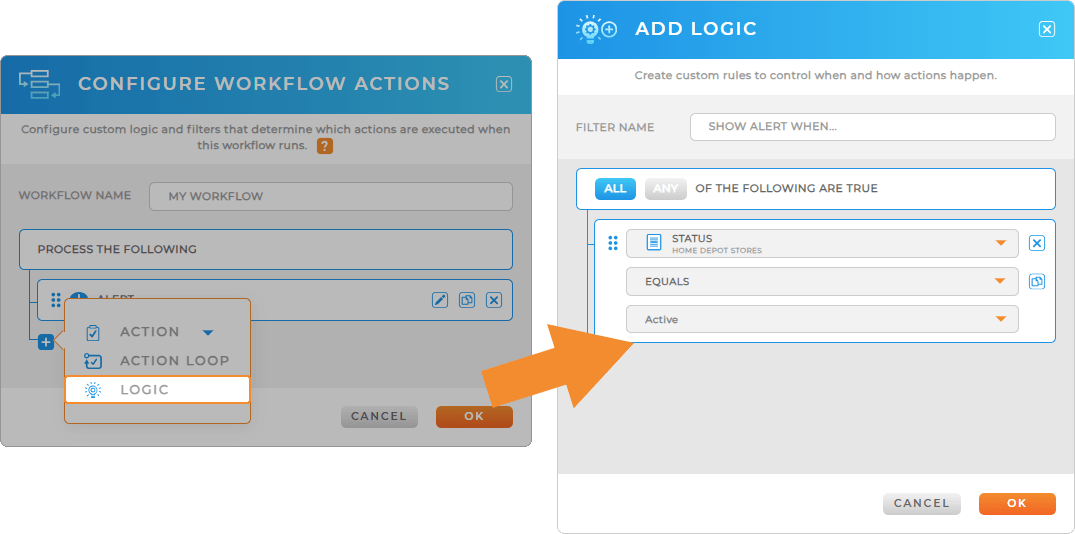
Want your alert to only display in specific situations? Add logic to control exactly when it fires.
- Click the logic icon next to your Alert Message action
- Add conditions like Status = “Pending Approval” or Priority = “High”
- This helps you guide users only when needed—without unnecessary interruptions

WHAT’S NEXT?
You’re ready to level up your automations with smarter communication. Try pairing Alert Message with other steps like:
- Send an Email for external notifications
- Update Values in Dataset after confirmation
- Confirmation Message for “Yes/No” prompts
It only takes a few seconds to make your workflow more intuitive—start customizing your Alert Messages now!


