Quick Reference Guide
Workflow Actions: Confirmation Message
- Quick Reference Guide
- WORKFLOWS
- Confirmation Message
Want to give users a chance to confirm before taking action? The Confirmation Message step adds a simple “Are you sure?” moment to any workflow—helping reduce mistakes, misclicks, or unwanted updates.
It’s great for deletions, status changes, or any high-impact action that deserves a second look. Let’s walk through how to set it up and where it shines best.
ADD A CONFIRMATION STEP
To add a Confirmation Message to your workflow:
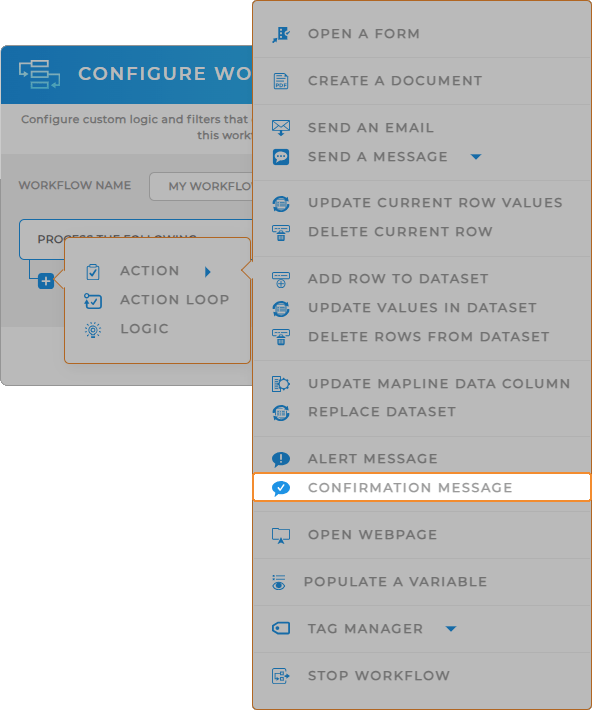
- Click the + icon in your workflow
- Choose Step > Confirmation Message
- Name your step (e.g., “Confirm Deletion” or “Double Check Status Change”)
This will insert a prompt before the workflow continues, giving users a Yes/No choice before the next step runs.


Pro Tip: Use Confirmation Message steps right before high-impact actions like Delete Row, Update Values, or Send Email. It’s also a great way to let users double-check details before submission in multi-step forms.
CONFIGURE YOUR MESSAGE
Customize the prompt so it’s clear and specific:
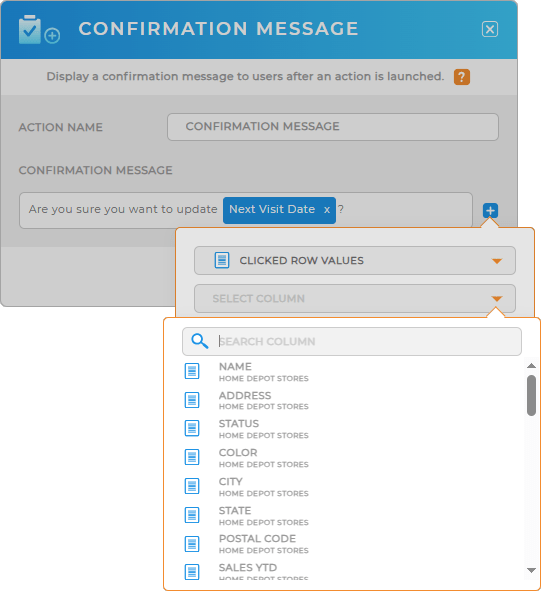
- Title: Give your message a clear header, like “Are you sure you want to delete this row?”
- Body: Add extra context or cautionary info (optional)
- Button Labels: Customize your buttons—“Yes, delete” and “Cancel” are common options
This confirmation message will appear whenever the workflow reaches this step—helping prevent accidents and ensure intent.

CONTROL WORKFLOW PATH
What happens if the user clicks No? You can decide exactly how the workflow behaves next:
- Branch to a different action (like Send Message or Stop Workflow)
- Show a follow-up alert or thank-you message
- Redirect them to a different form or page
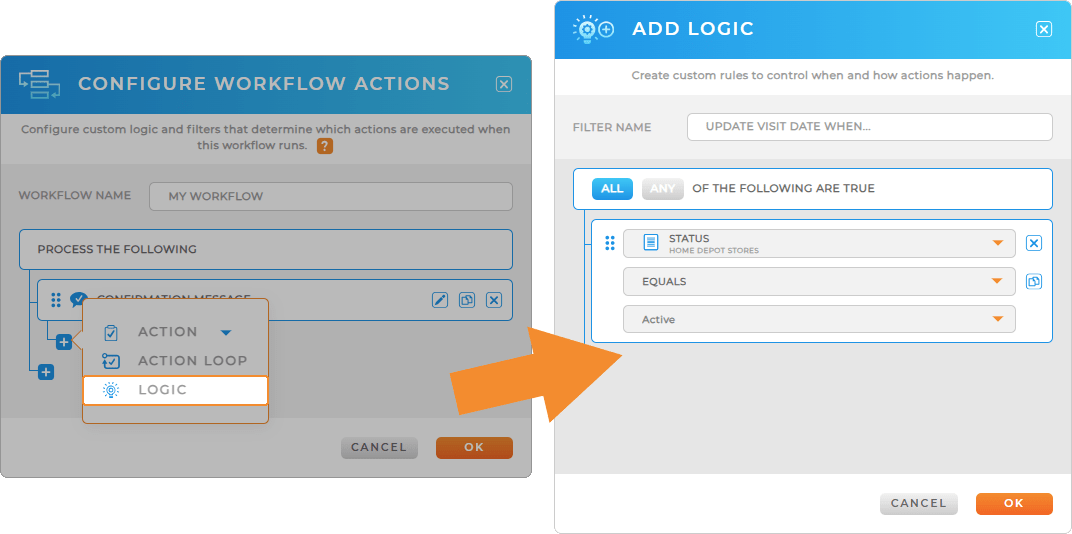
Use the logic builder to define what should happen depending on their choice—giving you full control over the experience.

ADD A SAFETY NET TO YOUR WORKFLOWS
Once your Confirmation Message action is in place, you’re ready to build on that moment of clarity. A well-timed confirmation gives users the assurance they need—whether they just submitted a form, triggered an update, or deleted a record. From there, you can guide them seamlessly into the next step of your workflow. It’s the perfect opportunity to keep momentum going and reduce friction in your process.
After configuring the Confirmation Message workflow action, consider adding:
- Open a Form to collect additional information or launch the next task in the process
- Update Values in Dataset to reflect the user’s action or trigger downstream reporting
- Populate Variable to set dynamic conditions based on user input or context
- Open Webpage to direct users to a help doc, dashboard, or custom destination


