Quick Reference Guide
Workflow Actions: Stop Workflow
- Quick Reference Guide
- WORKFLOWS
- Stop Workflow
Sometimes the smartest move is knowing when to stop. The Stop Workflow action acts as your safety net—giving you full control over when a workflow runs, and when it doesn’t. Whether you’re filtering bad data, catching incomplete records, or controlling timing across branches, this action ensures workflows only execute when they should.
Let’s walk through how to add a Stop Workflow action—and where it shines most.
ADD A STOP WORKFLOW ACTION
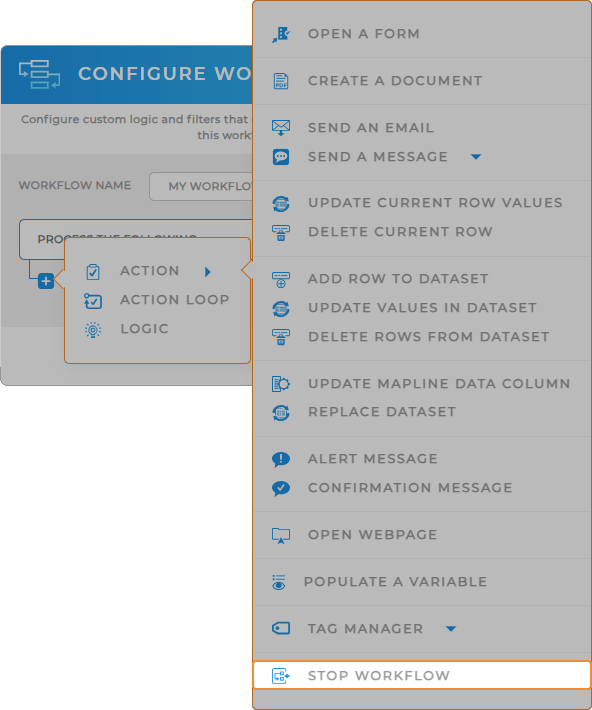
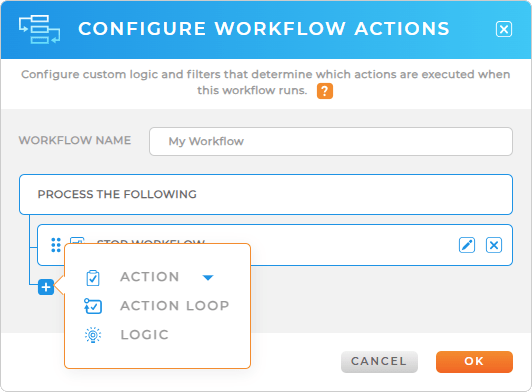
To add a Stop Workflow action, start by opening or creating a workflow and clicking + Add Action.
- Select Stop Workflow from the action list.
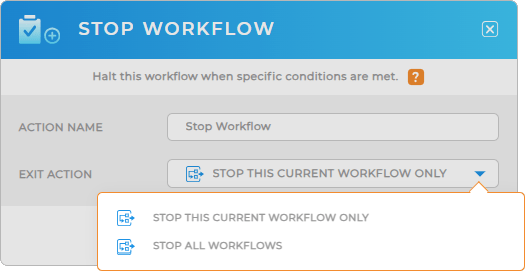
- Give your action a name like “Missing Customer Info” or “Skip Weekend Runs.”
When a workflow hits this action, it will immediately stop—skipping all subsequent actions.


Pro Tip: Use Stop Workflow to block updates when key data is missing, prevent duplicate records, or skip unnecessary steps. It’s like putting up guardrails that keep your automations clean and focused.
CHOOSE YOUR CONDITIONS
Stopping a workflow on its own is powerful. But using conditions lets you get really strategic.
Click Add Condition to define the rules that determine when the workflow should end early. Examples:
- If Email = blank → Stop the workflow
- If Status = “Cancelled” → Stop the workflow
- If Last Updated Date is before a certain value → Stop the workflow
Use multiple conditions and formulas to fine-tune the logic to your needs.

ADVANCED BRANCHING
Stopping a workflow doesn’t mean halting progress everywhere. If you’re using Branching logic in your workflow, a Stop Workflow action will only stop that branch—it won’t cancel the whole workflow unless it’s on the main path.
That makes this perfect for “if this, do nothing—but if that, continue” logic.

TAKE CONTROL OF YOUR AUTOMATIONS
The Stop Workflow action gives you precise control over when your automation begins—and when it pauses. Whether you’re inserting a review step, validating key inputs, or building conditional logic into your process, stopping the workflow ensures nothing continues until you’re ready. It’s ideal for workflows that depend on user confirmation, external approvals, or follow-up events like data syncing or analytics tracking. When used thoughtfully, this action puts safeguards in place that prevent errors and improve workflow accuracy.
After configuring the Stop Workflow action, consider adding:
- Alert Message to inform users that additional steps or approvals are required before continuing
- Confirmation Message to let users know why the workflow paused and what happens next
- Populate Variable to track a flag or status that determines when or how the workflow should resume
- Update Values in Dataset to log the pause or set up indicators for follow-up actions


