MAPLINE
February 2023
UPDATES
MAPLINE
February 2023
UPDATES
It’s been a cold winter, but Mapline is coming in hot with some powerful updates this month. We’re beyond excited to share what we’ve been up to. Check it out!
ROUTE OPTIMIZATION ENHANCEMENTS
We just introduced even more route optimization options!
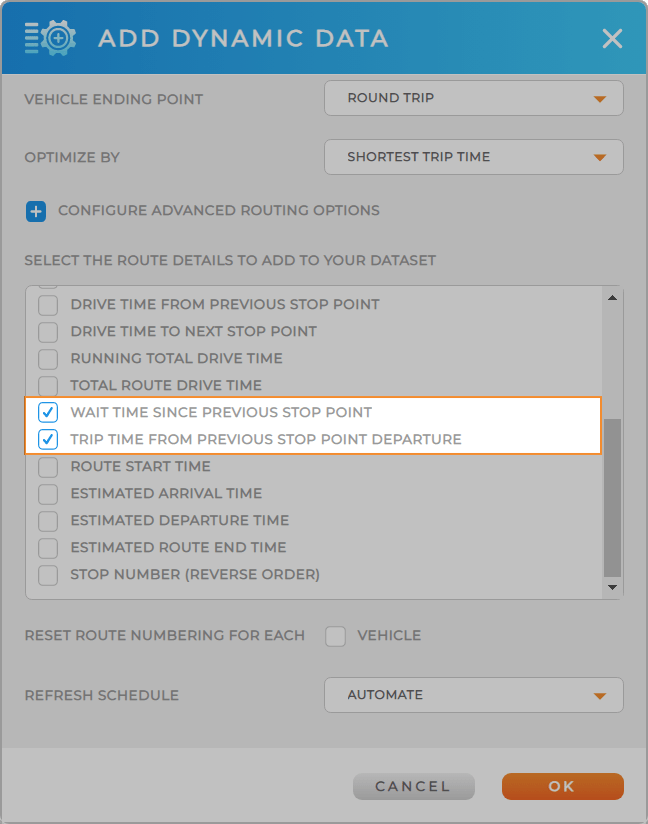
Calculate trip time and wait time between stops. If you have locations with delivery windows, sometimes your optimized routes will include wait times. In many cases, it’s actually more optimal to have a driver wait on-site for a few minutes than it is to send them across town and back again.
That’s why these two new options have been introduced to your Route Optimization settings:
- Wait Time Since Previous Stop Point: Add a driver’s on-site wait time to your dataset, so you can always see exactly how long a driver has to wait on-site, if at all.
- Trip Time Since Previous Stop Point Departure: Add the drive time since the previous stop to your dataset, so you can always see exactly how long it’ll take for your driver to get from stop to stop, including any on-site wait time.
What a fantastic way to get insight into exactly how long your routes are taking.

CONTROL COLUMNS- ENHANCEMENTS
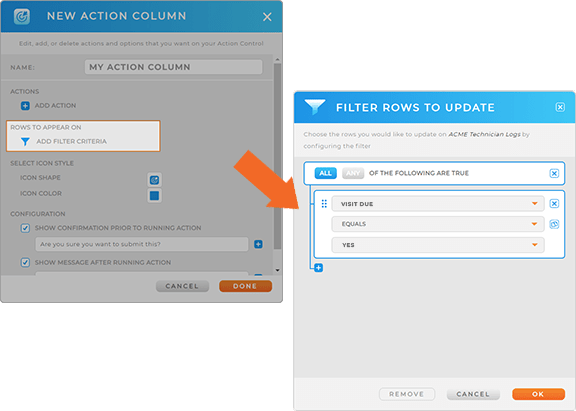
Filter your action and form columns to customize your team’s experience!
Button columns are a powerful way to add the exact resources you need, right within your dataset.
Set specific filters to determine which rows your action and form column data appears on.
For example, if your team has to fill out a specific form while on-site, set your filter so that the form only appears in your dataset when the on-site visit has not yet been completed. This way, your dataset always displays the locations that have yet to be serviced.
How cool is that!?


