Quick Reference Guide
Maps: Layer Settings
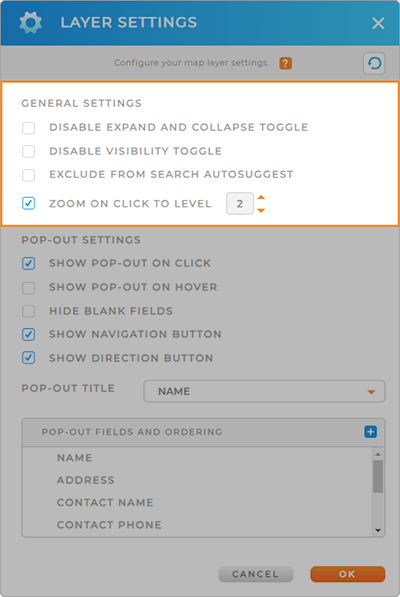
GENERAL SETTINGS
These settings give you unprecedented control over the organization and functionality of your maps!
Navigate your map faster than ever, with even increased clarity and efficiency. You’re in the driver’s seat, with full control over the following functions:
DISABLE EXPAND AND COLLAPSE TOGGLE: Determine whether the layer folder is always expanded or collapsed in the sidebar. (Expanded folders will display all of the elements contained within that folder, such as pins, shapes, or territories.
DISABLE VISIBILITY TOGGLE: Ensure that this layer folder cannot be accidentally toggled on and off. Perfect for layers you want to keep visible on your map, no matter the circumstances.
EXCLUDE FROM SEARCH AUTOSUGGEST: Keep this layer from appearing in the autosugesstions in your map’s search bar.
ZOOM ON CLICK TO LEVEL: When you click a pin, the map will automatically zoom to the level you specify.
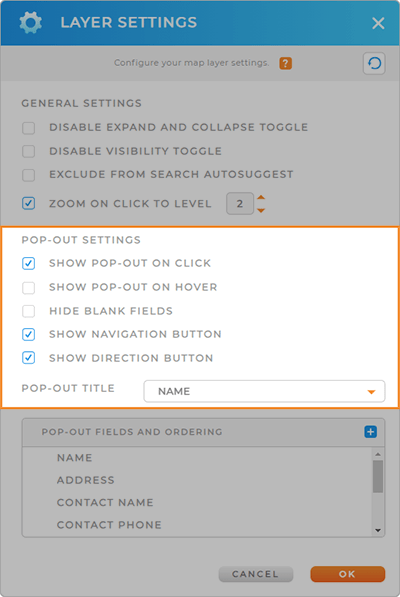
POP-OUT SETTINGS
Not only do you have full control over your layer folders, but you can customize the behavior and appearance of your pop-out bubbles, too!
Pop-out bubbles are the informational windows that appear above map elements you’ve clicked on, such as territories or pins. The following settings allow you to decide when, how, and what to display when you interact with map elements:
SHOW POP-OUT ON CLICK: Pop-out bubbles will appear whenever you click on a map element.
SHOW POP-OUT ON HOVER: Pop-out bubbles will appear whenever you hover your mouse over a map element.
HIDE BLANK FIELDS: Keep your pop-out bubble text easy to read by hiding any fields that are blank in your dataset.
SHOW NAVIGATION BUTTON: Keep the NAVIGATION button visible in your pop-out bubbles, giving you quick access to live, in-app navigation at any time.
SHOW DIRECTION BUTTON: Keep the DIRECTIONS button visible in your pop-out bubbles, giving you access to downloadable driving instructions at any time.
This way, you always have the exact information you need, whenever you need it. How awesome is that?

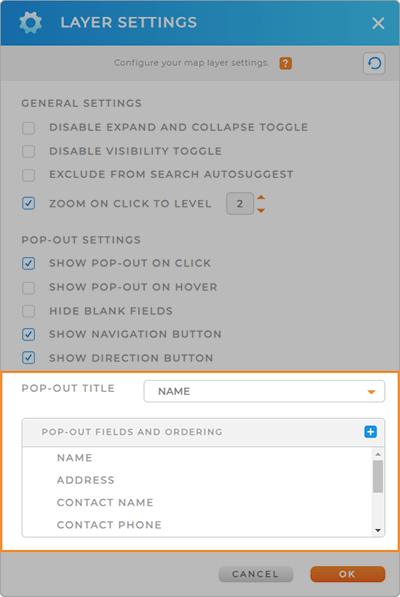
POP-OUT FIELDS AND ORDERING
Finally, customize the content within your pop-out bubbles, from the title text to the visible fields and their order.
Do you want to see technician names, customer names, or how many days until a location is due for a visit? Easy! Just configure the following fields and BAM! You’re done.
POP-OUT TITLE: Choose your pop-out bubble title by selecting a dataset column from the drop-down menu.
REARRANGE FIELDS: To change the field order, hover over the field on the left, click, and drag it to your desired position.
DELETE FIELDS: Remove unnecessary fields by hovering over the right side of the field and clicking the trash icon.
ADD FIELDS: Click the blue + sign in the top-right corner of this section to bring in additional fields from your source dataset.
Now, if that’s not a highly-customizeable pop-out bubble, we don’t know what is!