Quick Reference Guide
ADD COLUMN: FILE COLUMN
- Quick Reference Guide
- FILE COLUMN
Create a new dataset column with a file upload button! This gives you the power to quickly attach new files to your data on an as-needed basis. Whenever you need to manually add receipts, contracts, images, or anything else to your data, just click a button, upload your file, and BAM! You’re good to go.
Empower your team to work smarter, not harder, so they can get back to what they do best: keeping sales high and your customers happy. Here’s how to get started.
ALLOWED FILES
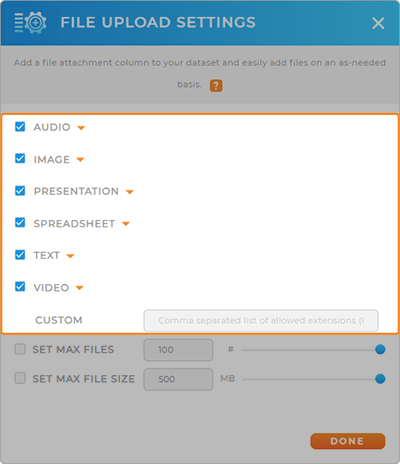
First, configure which file types are allowed so you can ensure your team always submits the right data. Choose from the following file types:
- AUDIO: Upload audio files like voice notes
- IMAGE: Easily attach images such as delivery confirmation or proof of service
- PRESENTATION: Attach client presentations or pitch decks
- SPREADSHEET: Link to a spreadsheet for easy access to pertinent data
- TEXT: Upload text files such as customer notes or service needs
- VIDEO: Attach videos, like maintenance or technician records
- CUSTOM: Type a comma-separated list of custom extensions you allow

FILE SIZE
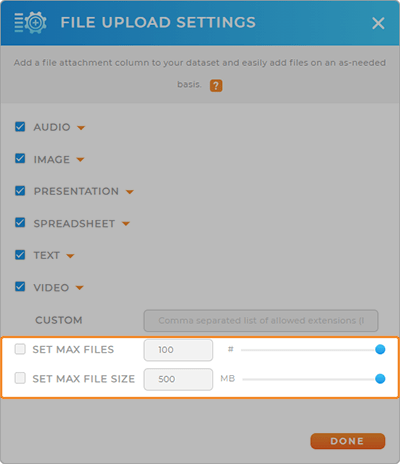
Once you’ve selected the allowed file types, it’s time to set your file size specifications. This allows you to control the file size and limit the amount of space it takes to store your file uploads. Tap into the following customizations:
- SET MAX FILES: Choose the maximum number of files that can be uploaded
- SET MAX FILE SIZE: Choose the maximum number of megabytes that can be uploaded
When you’re finished, click DONE to apply your changes.

CLICK & ADD FILES
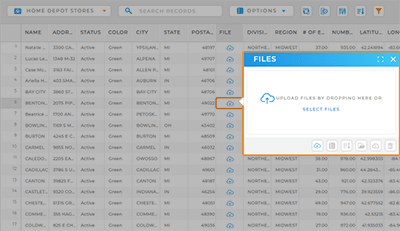
Now, your dataset contains a new column with a file upload icon. Simply click the icon in the row you’d like to attach data to, then upload the files you need! This is a great way to empower your team to attach files on-the-go, or to add files that are sent over manually by clients and customers.
Easily share this dataset with your team, or create a view to ensure the right people have the right access.


