How-To Guide
Add a New Map
ADD NEW ITEMS
There are the two primary ways to add a new map into Mapline:
- Visit your Maps Library and click the orange Add New Items button in the right sidebar.
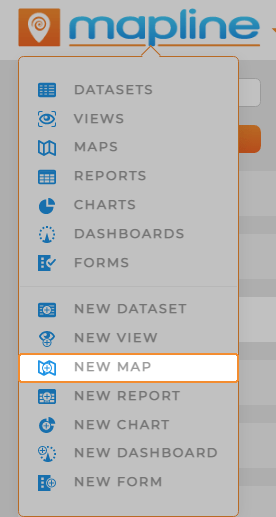
- Click the Mapline logo from anywhere in Mapline, and select New Map from the dropdown menu.
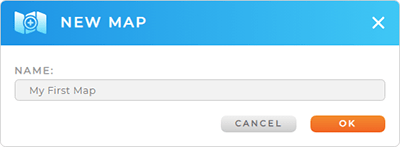
NAME YOUR MAP
Name your map, then click the orange OK button at the bottom-right of the New Map window.
Your new map opens automatically, so you can start customizing it right away.
Pro Tip: Every new map auto-saves to the Maps Library, where you can access it any time.
CUSTOMIZE YOUR MAP
Hey, that was easy! You just created a new, blank map. Now, it’s time to customize your map and add all the elements you need to succeed. Here are some great ways to get started:
- Generate pins from a spreadsheet
- Create custom territories
- Add custom shapes
- Style your map pins
- Customize your map settings
- Create optimized routes from your pins
- Segment and color-code your pins based on data
